Hello beautiful peoples!

UPDATE: I tested this HOWTO with an older Intel GPU as well as a virtual machine GPU, and it worked flawlessly. However, when applying the same steps on a system equipped with an NVIDIA RTX 3050 using proprietary drivers, the Plymouth splash appeared during shutdown but failed to show up at boot. It happens because the NVIDIA proprietary driver doesn’t support early kernel mode setting (KMS). Plymouth needs KMS at boot to show the splash, but the driver only initializes graphics later. This is why you see the splash on shutdown, not on startup. Workarounds exist but I don’t feel like Plymouth boot splash is worth messing up your graphics… I will still use this on my machines without NVIDIA cards.
This tutorial shows how to extract the default ParrotOS 6.2 Plymouth theme from a Live environment and install it on Debian (possibly Debian-based distros as well). By following these steps, you will enable and troubleshoot the theme to customize your Debian boot splash.
Why? I don’t know. I really like the glitchy effect of the boot splash. For some reason, I enjoy how it looks and behaves.
Let me preface this tutorial by letting you know this… This how-to is NOT exactly a step-by-step, no-brain-required, copy and paste tutorial. If I were to categorize it, it is a list of steps that, when followed correctly, will give you the right results.
Saying this, it is not a very difficult task. It is as easy as:
- Boot ParrotOS 6.2 Live
- Find my favourite Plymouth Theme
- Mount my Debian installation in
/mnt - Copy the Plymouth Theme to the
/mnt/root/folder - Reboot to my Debian installation and install, enable, and test the Plymouth Theme
So let’s get to it… I have booted ParrotOS Live and I will be locating Plymouth boot themes, which should be stored in the /usr/share/plymouth/themes/ folder. Lets gain root’s privileges and list the content of this folder.
sudo su -
ls /usr/share/plymouth/themes/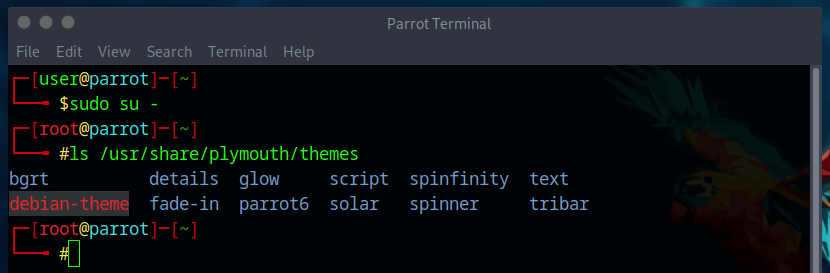
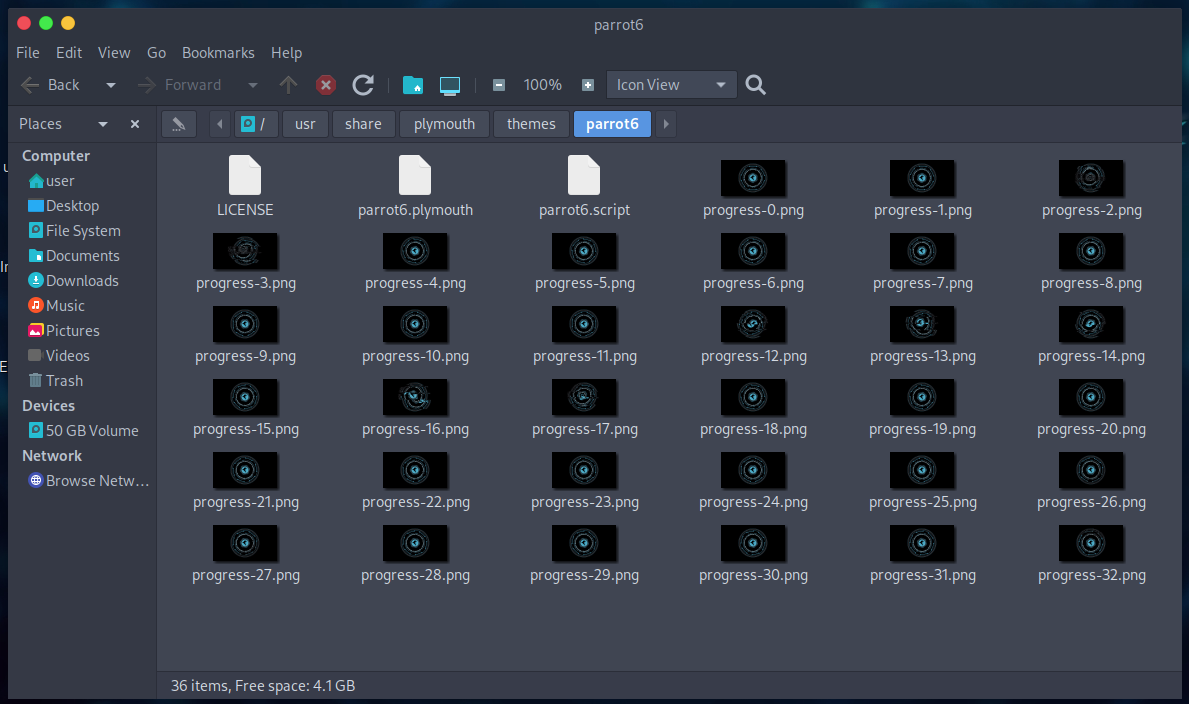
Now… I happen to know that the Plymouth boot splash theme I like is in the folder parrot6, but if you’re not sure, you can open /usr/share/plymouth/themes/ in the file explorer and check the contents of its subfolders until you find the theme you are looking for.
Now you will mount your Debian installation / partition in the ParrotOS’ /mnt folder so that we can copy the theme there.
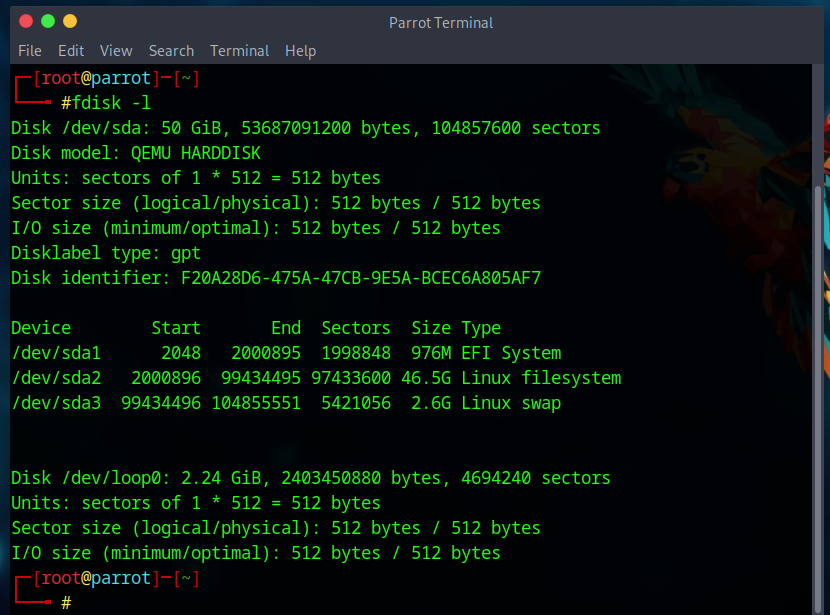
First, figure out the designation of your / Debian partition using fdisk -l and lsblk command in the terminal window you opened earlier.
fdisk -l
lsblk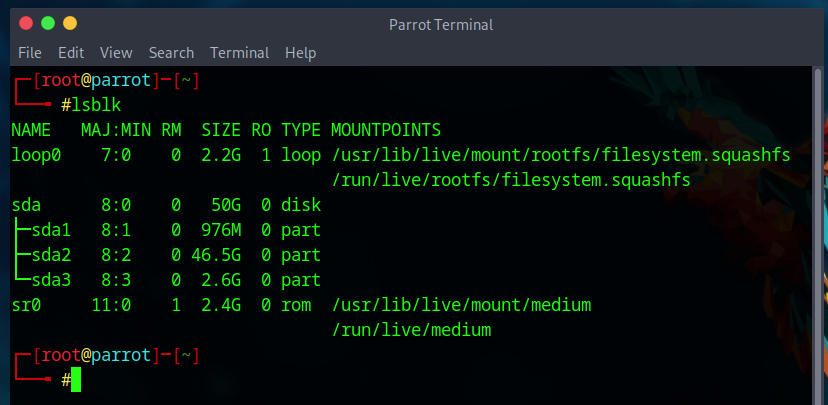
As you can see, both commands show that my system contains one drive – it’s 50 gigabytes in size and designated as /dev/sda. This drive is split into three partitions. The first, /dev/sda1, is 976 megabytes in size and marked as “EFI System”. The second, /dev/sda2, is 46.5 gigabytes in size and labeled “Linux filesystem”. The third and final partition, /dev/sda3, is 2.6 gigabytes in size and identified as “Linux swap”. I’ll give you one guess which of these is my Debian / partition… 😉
Now that we’ve identified /dev/sda2 as my Debian root partition, let’s mount it to the /mnt folder and copy the parrot6 folder from /usr/share/plymouth/themes/ into it. We are still working in the same terminal window with root privileges.
mount /dev/sda2 /mntcp -r /usr/share/plymouth/themes/parrot6 /mnt/root/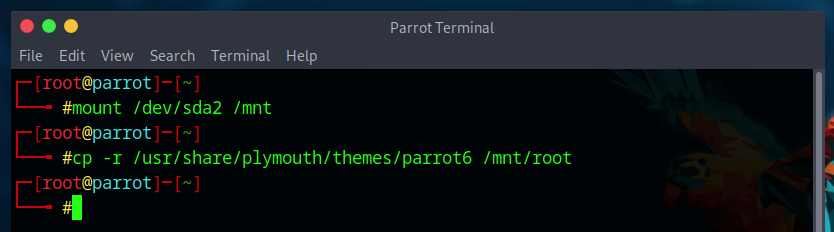
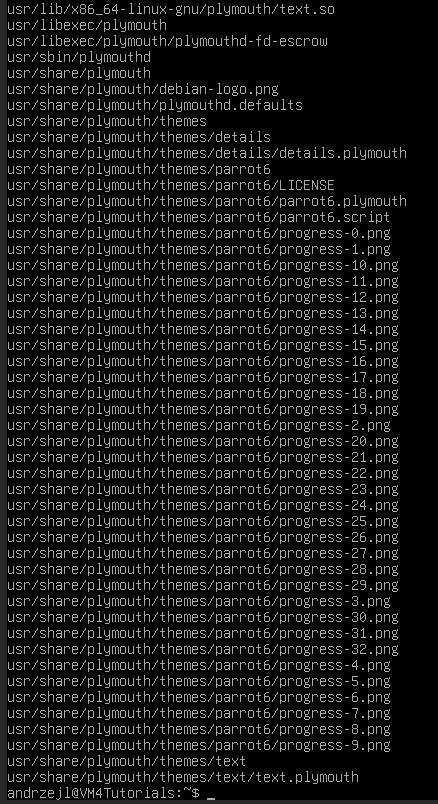
Let’s list contents of /mnt/root/ to confirm:
ls /mnt/root | grep parrot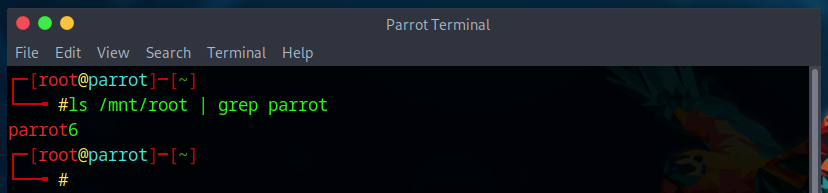
Sorted. Now type poweroff to shut down ParrotOS and remove the installation media once the computer powers off.

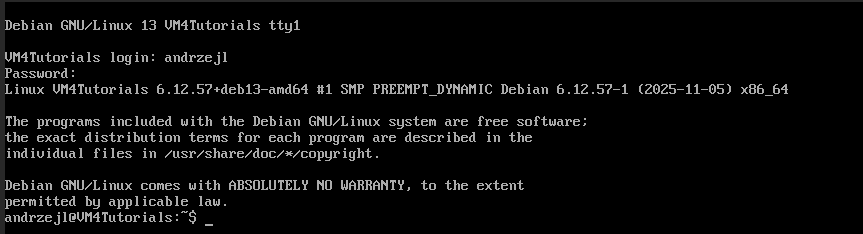
You can now power on the machine and boot into your Debian installation. My freshly installed setup does not have a graphical user interface (GUI), only a command line interface (CLI).
Let’s log into the system.
Now we need to refresh the list of packages available in the Debian repository and install few things:
sudo apt updatesudo apt install -y plymouth plymouth-themes initramfs-tools udev
The packages should install without any problems.
Next, we need to move the parrot6 folder from /root/ into /usr/share/plymouth/themes/.
sudo mv /root/parrot6 /usr/share/plymouth/themes/
Now let’s check if the theme was moved correctly
ls -l /usr/share/plymouth/themes/parrot6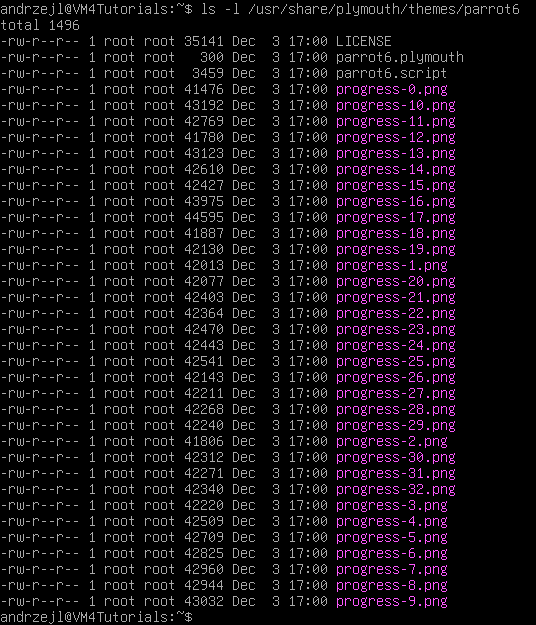
The folder appears to have been moved successfully. Now let’s set parrot6 as the default Plymouth theme.
sudo plymouth-set-default-theme parrot6
Now let’s verify that everything worked correctly and confirm the theme has been set as the default.
sudo plymouth-set-default-theme
Let’s rebuild the kernel image to ensure the Plymouth theme is included.
sudo update-initramfs -u
Let’s check if, after rebuilding the kernel the theme was added to its image.
lsinitramfs /boot/initrd.img-$(uname -r) | grep plymouth
Next, we need to edit the /etc/default/grub file. Ensure that splash is included in the GRUB_CMDLINE_LINUX_DEFAULT= line. We also need to add GRUB graphics configuration directives, which define how GRUB sets and passes display resolution to the Linux kernel, directly impacting Plymouth’s ability to show a graphical splash.
Let’s open /etc/default/grub in nano with root privileges.
sudo nano /etc/default/grub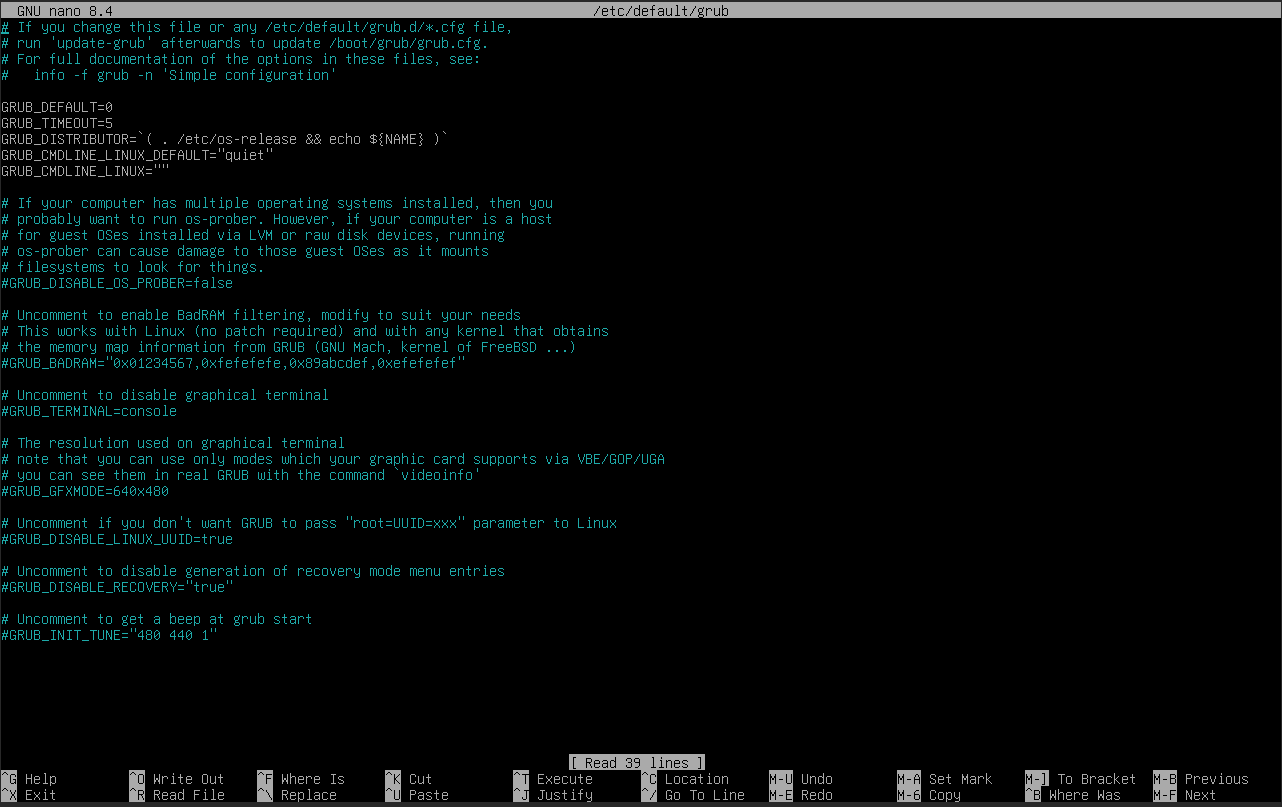
See this line? GRUB_CMDLINE_LINUX_DEFAULT="quiet"

Use the arrow keys to move the cursor just after the word quiet, then press space ![]() followed by typing in a word
followed by typing in a word splash.

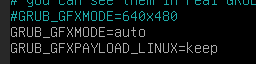
Locate the line #GRUB_GFXMODE=640x480.

Move the cursor just after 480 using the arrow keys, and press Enter ![]() to start a new line.
to start a new line.
Now type in:
GRUB_GFXMODE=autoAnd press Enter ![]() to start a new line.
to start a new line.
Now type in:
GRUB_GFXPAYLOAD_LINUX=keepIt should now look like this:
Press and hold Control  , then press X
  , and release both keys together.
At the bottom left of the Nano editor, you should see a message like this:
Save modified buffer?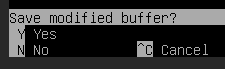
Press Y  and then Enter
 ![]() to save the file and close Nano editor.
to save the file and close Nano editor.
You are now back at the terminal window.
Now run the GRUB update command:
sudo update-grub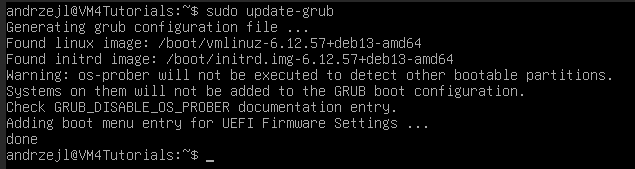
Rebuild the kernel image file again. Optional but recommended.
sudo update-initramfs -u
Now reboot the system:
sudo rebootAnd if everything went as it should You will see the boot splash screen during the next system startup.
I hope this helps!
Catch you on the flip side,
AndrzejL
P.S. This howto focuses on the parrot6 Plymouth theme and Debian Linux, but it also serves as a general guide for installing any Plymouth theme on (I assume) most Debian-based distros. You may need to tweak a few settings or adjust some commands, yet the steps outlined here provide a solid blueprint for getting the job done, and they should work on both Legacy BIOS and UEFI-based machines.
I am sharing this theme zipped here:
sha512sum ./parrot6.zip
9cca12c3a6503dbb0d980049a2c85ebeda112e53df306347626731b4b4ad5adbfae4f468b9fb68622c283b301bb424a59bc7e9efca65a2ffe72186be142931a8 ./parrot6.zip