Hello beautiful peoples!

The “Ultimate Performance” power plan in Windows is designed to maximize the performance of your computer. It’s like putting your PC / Laptop into turbo mode. This plan is not available by default on all systems because it is designed for high-power systems like workstations and servers. It aims to reduce micro-latencies associated with power management by allowing hardware to consume all the power it needs and disabling power-saving features.
“WOW THAT SOUNDS AWESOME! I WANT THAT!”
Ok BUT… There are few things you should know before you switch.
Because of increased use of power your machine will produce more heat. If your PC / Laptop’s cooling system is clogged with dust, hair, or is otherwise inadequate, your system may not be able to dissipate heat effectively. This can lead to several issues:
– Thermal throttling. Its a safety mechanism that reduces the CPU’s clock speed to prevent overheating and protect the processor from damage. Thermal throttling can cause a significant drop in performance, as the CPU slows down to reduce heat output.
– System Shutdown. In extreme cases, if the temperature continues to rise despite throttling, the system may shut down to prevent permanent damage. Consistently operating at high temperatures can accelerate wear on electronic components, potentially shortening the CPU’s lifespan.
Since this plan disables power-saving features and allows hardware to consume maximum power, it can drain the battery much faster than other power plans. This is why it is recommended to use this plan only when your laptop is plugged in.
Enabling the “Ultimate Performance” power plan on older or less powerful CPUs may not yield significant benefits. These CPUs have inherent limitations that prevent them from fully leveraging the plan’s potential. As a result, you might not notice a substantial improvement in performance, and the increased power consumption could still lead to higher heat output without the desired performance gains. It’s important to consider your system’s capabilities before making such adjustments.
Another thing that I believe You should be aware of is the fact that many laptop manufacturers, especially those focused on gaming, provide their own “control suites” to help users boost performance without directly altering power plans. These applications offer a range of features that allow you to optimize your laptop’s performance, manage cooling, and customize settings to suit your needs.
So… More power = more heat and shorter battery life.
“Got it – I want to give it a try anyway!”
Alrighty then… Let’s check if “Ultimate Performance” power plan is available on Your system by default.
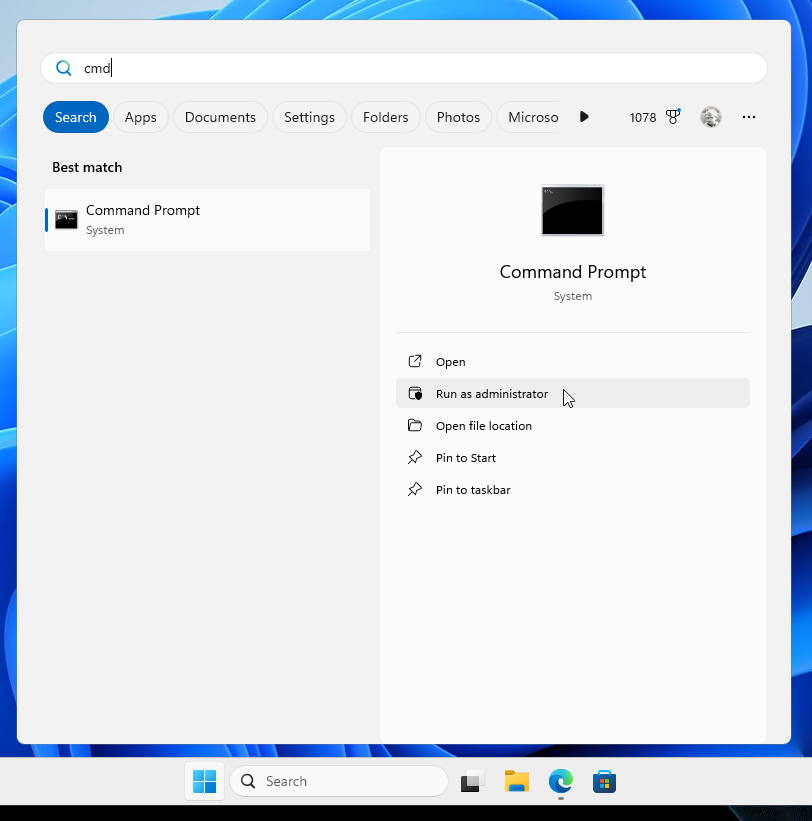
Click on Start Menu, type in cmd and click on “Run as administrator” in the right pane of the Start Menu window.
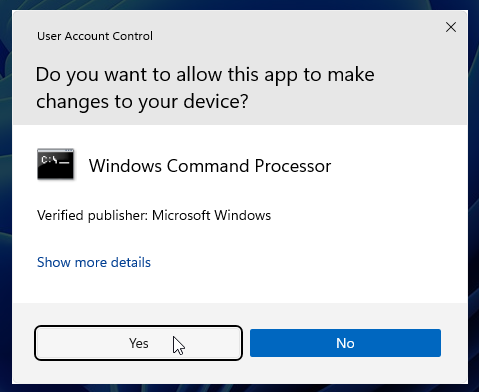
When asked “Do you want to allow this app to make changes to your device?” confirm by clicking on ![]() yes button.
yes button.
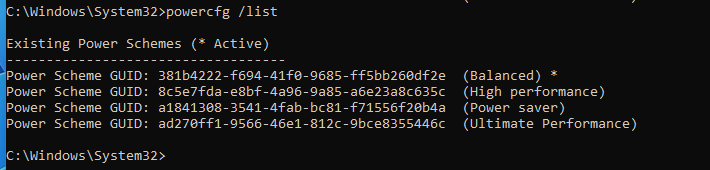
Type this command and confirm with ![]() enter button to list all power plans currently available in your system.
enter button to list all power plans currently available in your system.
You can also copy the command below and paste it into the Command Prompt window by right clicking in it.
powercfg /list
As You can see its not available here. I have 3 power plans available:
– Balanced – its marked with * which means its currently default and active
– High Performance
– Power saver
To add “Ultimate Performance” power plan run this command:
powercfg -duplicatescheme e9a42b02-d5df-448d-aa00-03f14749eb61
Now list the available power plans again:
powercfg /list
As You can see the Ultimate Performance power plan is now listed.
To switch to it make a note of the plan’s GUID and run this command.
powercfg -setactive GUIDso in my case it will look like this:
powercfg -setactive ad270ff1-9566-46e1-812c-9bce8355446cYou don’t need to type in the GUID. Simply highlight the GUID text by left clicking and dragging with your mouse, right-click on the selected text, then right-click again in the Command Prompt window to paste it.

List the power plans again:
powercfg /list
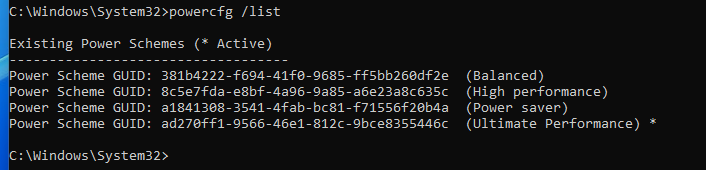
As You can see Ultimate Performance power plan is now not only present but also active (marked with *).
IF for any reason You ever decide to switch back to Balanced power plan – just follow this HOW-TO again and use Balanced power plan GUID when running:
powercfg -setactive GUIDBonus tips:
You can also change when your screen turns off and when your PC or laptop goes to sleep using the command line. Examples:
– Turn the screen off after 1 minute:
‣ When plugged in:
powercfg -change -monitor-timeout-ac 1‣ When on battery:
powercfg -change -monitor-timeout-dc 1– Put the computer to sleep after 2 minutes:
‣ When plugged in:
powercfg -change -standby-timeout-ac 2‣ When on battery:
powercfg -change -standby-timeout-dc 2

You can adjust the time values to fit your needs. Use 0 when running the commands to disable both features:

Interesting command this powercfg… Curious what else it can do? Type in powercfg /? in the Command Prompt to find out…
I hope this helps!
Catch you on the flip side,
AndrzejL